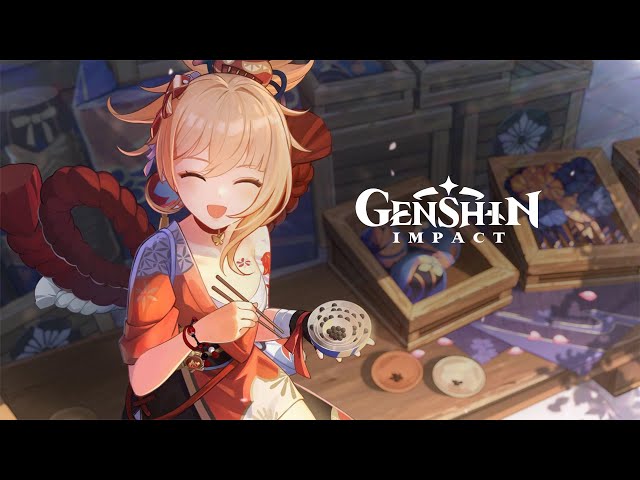
Genshin Impression’s Yoimiya is a spirited, optimistic younger lady who can typically be discovered setting off fireworks to entertain the youngsters of Inazuma. She’s a real vivid spark, and that carries over to her explosive playstyle as a five-star pyro bow wielder. So seize a sparkler, it’s time to dive into our Genshin Yoimiya construct, that includes her finest weapons, artifacts, and extra.
To remain updated with all the new and upcoming characters, ensure you check out our Genshin Impression Alhaitham, Genshin Impression Yaoyao, Genshin Impression Baizhu, and Genshin Impression Dehya guides. Then for some further primogems, I like to recommend testing our Genshin Impression codes record.
Genshin Impression Yoimiya

What’s the very best Genshin Yoimiya construct?
Yoimiya is a five-star pyro DPS. She actually lacks a few of the punch afforded by different DPS models like Genshin Impression’s Ganyu or Genshin Impression’s Hu Tao, and is sort of replaceable – which means, in the event you’re tight on primos and in determined want of a robust DPS, she most likely isn’t the only option to drag for.
Nonetheless, she’s extraordinarily lovable, and a variety of gamers love her regardless of her not being thought-about ‘meta’. She is able to dealings good injury in the correct crew, could be very straightforward to play, and her wide selection undoubtedly presents a profit when going up towards enemies like Spectres or Thundering Manifestation.
She’s very quick, and able to dealing loads of injury to single targets, scaling properly with off discipline DPS like Genshin Impression’s Fischl, Genshin Impression’s Beidou, and Genshin Impression’s Xingqiu. Her easy gameplay makes her a fantastic character for individuals who wish to simply sit again and watch the fireworks, and constructing her is sort of reasonably priced on the subject of artifacts, weapons, and crew comps.
Relating to her negatives, she actually struggles in multi-target conditions, as her regular assaults can solely hit one enemy at a time. When it comes to competitors, Genshin Impression’s Hu Tao outperforms her in single-target situations, and Genshin Impression’s Xiangling (a four-star, due to this fact a simple character to C6) outperforms her in most multi-target situations. She additionally depends on her off-field DPS, which means it’s essential spend money on a number of characters so as to make her viable.
Total, Yoimiya is a really pleasant character, with an lovable design, enjoyable, easy gameplay, and nice voice actors. Whereas she could not prime the meta charts, she nonetheless had her place within the roster, and within the hearts of many people.
What’s the very best Genshin Yoimiya weapon?
For Yoimiya’s weapon decisions, Thundering Pulse takes the highest spot. When utilizing Thundering Pulse, you need to at all times intention to solid her elemental burst earlier than her elemental talent.
One other attention-grabbing selection for Yoimiya is the Polar Star, principally due to his excessive crit price bonus impact. Nonetheless, it’s major caveat is incomes stacks so as to earn the assault bonus, which requires hitting an enemy with every completely different sort of assault. Sadly, as her elemental talent technically doesn’t injury enemies, she will be able to solely get a most of three stacks, which means she solely has a 30% injury buff as an alternative of 48%. We advocate solely utilizing Crimson Witch of Flames with this bow, as Shimenawa’s Memory will make it tough to drag off a burst each rotation.
Skyward Harp is one other viable possibility in that, although considerably uncommon, its passive hits in an AoE which combats one among Yoimiya’s major limitations.
Relating to four-star choices, Rust is by far the very best, and at excessive refinement ranks it could outperform Skyward Harp, particularly with the assistance of Bennett’s assault buff. It’s a really worthy weapon at R5, synergising properly with Yoimiya and having no situations on its passive.
Lastly we now have the three-star bow, Slingshot. Amazingly, R5 Slingshot outperforms Rust R1 when mixed with Bennett’s assault buff and Yoimiya is provided with an assault% sands. It has nice vary, and offers you a serving to hand in balancing your crit ratio with its crit price sub-stat.
| Weapon | Impact | Learn how to acquire |
| Thundering Pulse | Bonus impact: crit injury+14.4% Talent: Will increase assault by 20% and grants a thunder emblem. At stacks one, two, and three, regular assault injury is additional elevated by 12, 24, and 40% respectively. Every stack has a person length and is achieved by performing: • Regular assaults with elemental injury (length 5 seconds) • Casting an elemental talent (length ten seconds) • Having lower than 100% vitality (disappears at full vitality) |
Gacha |
| Polar Star | Bonus impact: crit price+7.2% Talent: will increase elemental talent and component burst injury by 12%. After a standard assault, charged assault, elemental talent, or elemental burst hits an opponent, Yoimiya beneficial properties one stack of Ashen Nightstar for 12 seconds. When one/two/three/4 stacks of Ashen Nightstar are current, assault will increase by 10/20/30/48%. The stacks of Ashen Nightstar created by every completely different sort of assault are counted independently of others |
Gacha |
| Skyward Harp | Bonus impact: crit price +4.8% Talent: will increase crit injury by 20%. Hits have a 60% probability to inflict a small AoE assault, dealing 125% bodily assault injury. Can solely happen as soon as each 4 seconds |
Gacha |
| Rust | Bonus impact: assault +9% Talent: will increase regular assault injury by 40% however decreases aimed shot injury by 10% |
Gacha |
| Slingshot | Bonus impact: crit price +6.8% Talent: if a standard assault or aimed shot hits a goal inside 0.3 seconds of being fired, will increase injury by 36%. In any other case, decreases injury by 10% |
Gacha |

What are the very best Genshin Yoimiya artifacts?
Typically, we advocate a full set of Crimson Witch of Flames if in a vaporize or overload crew, and Shimenawa’s Memory for some other crew comp.
| Artifact set | Impact |
| Shimenawa’s Memory | Two outfitted: will increase assault by 18% 4 outfitted: if you solid an elemental talent, if Yoimiya has 15 or extra vitality, they lose 15 vitality and regular, charged, and plunging assault injury is elevated by 50% for ten seconds |
| Crimson Witch of Flames | Two outfitted: will increase pyro injury by 15% 4 outfitted: will increase overloaded and burning injury by 40%. Will increase vaporize and soften injury by 15%. While you use an elemental talent the two-piece set results are elevated by 50% for ten seconds |
Stat suggestions
Fundamental stats:
- Sands of Eon – assault% or elemental mastery
- Goblet of Eonothem – pyro injury %
- Circlet of logos: crit price/crit injury (attempt to keep a 1:2 ratio)
Sub-stats:
You typically need Yoimiya to have round 120-160% vitality recharge, perhaps larger relying on construct and crew composition. Mess around and see what works for you. Apart from that, intention for the next.
- Crit price/crit injury
- Assault%
- Elemental mastery

What are Genshin Yoimiya’s abilities?
Lively abilities:
| Talent | Impact |
| Firework Flare-Up | Hearth 5 consecutive photographs together with your bow |
| Firework Flare-Up (charged) | Cost as much as carry out a stronger, extra exact shot. The impact modifications the longer you cost: One cost: the arrow offers pyro injury Two expenses: generate three kindling arrows that hit close by enemies and deal pyro injury |
| Niwabi Hearth-Dance | Wave a sparkler to create a hoop of saltpeter. Throughout this time, any arrow you hearth will turn out to be a blazing arrow, and it’ll dish out elevated pyro injury. Nonetheless, your charged regular assault is not going to produce kindling arrows |
| Ryuukin Saxifrage | You launch rockets towards the enemy and deal AoE pyro injury. All regular, charged, and plunging assaults, in addition to elemental bursts and abilities dealt by celebration members apart from Yoimiya, will mark the enemy with an Aurous Blaze. The blaze triggers an explosion that causes AoE pyro injury |
Passive abilities:
| Talent | Impact |
| Methods of the Hassle-Maker | Throughout Niwabi Hearth-Dance, photographs from Yoimiya’s regular assault enhance her pyro injury by 2% on hit. This lasts for three seconds and may have a most of ten stacks |
| Summer season-Evening’s Daybreak | Utilizing Ryuukin Saxifrage causes close by celebration members to realize a ten% assault enhance for 15 seconds. Moreover, an additional assault bonus is added primarily based on the variety of ‘Methods of the Hassle-Maker’ stacks when utilizing Ryuukin Saxifrage. Every stack will increase this bonus by 1% |
| Blazing Match | When Yoimiya crafts decorations, ornaments, or landscape-type furnishings, she has a 100% probability to refund a portion of the supplies |

What are Genshin Yoimiya’s constellations?
Be taught extra about Yoimiya’s constellations under.
| Constellation | Impact |
| Agate Ryuukin | The Aurous Blaze lasts for an additional 4 seconds. Moreover, when an opponent affected by Aurous Blaze is defeated, Yoimiya’s assault is elevated by 20% for 20 seconds |
| A Procession of Bonfires | When Yoimiya’s scores a vital hit with pyro injury, she’s going to acquire a 25% pyro injury bonus for six seconds. This may be triggered even when Yoimiya is just not lively |
| Trickster’s Flare | Will increase the extent of Niwabi Hearth-Dance by three |
| Pyrotechnic Skilled | When Aurous Blaze triggers an explosion, Niwabi Hearth-Dance’s cooldown is decreased by 1.2 seconds |
| A Summer season Competition’s Eve | Will increase the extent of Ryuukin Saxifrage by three |
| Naganohara Meteor Swarm | Throughout Niwabi Hearth-Dance, Yoimiya’s regular assaults have a 50% probability of firing an additional Kindling Arrow that offers 60% of its unique injury. That is thought-about regular assault injury |

What are Genshin Yoimiya’s ascension supplies?
Don’t waste any of your naku weed, you’re going to wish so much so as to totally ascend Yoimiya.
| Required stage | Mora | Supplies |
| 20 | 20,000 | One agnidus agate sliver, three naku weed, three divining scroll |
| 40 | 40,000 | Three agnidus agate fragment, two smoldering pearl, ten naku weed, 15 divining scroll |
| 50 | 60,000 | Six agnidus agate fragment, 4 smoldering pearl, 20 naku weed, 12 sealed scroll |
| 60 | 80,000 | Three agnidus agate chunk, eight smoldering pearl, 30 naku weed, 18 sealed scroll |
| 70 | 100,000 | Six agnidus agate chunk, 12 smoldering pearl, 45 naku weed, 12 forbidden curse scroll |
| 80 | 120,000 | Six agnidus agate gemstone, 20 smoldering pearl, 60 naku weed, 24 forbidden curse scroll |

What are Genshin Yoimiya’s expertise stage up supplies?
Listed here are all of the expertise level-up supplies it’s essential ascend one among Yoimiya’s abilities to stage ten.
| Degree | Mora | Supplies |
| Two | 12,500 | Six divining scroll, three Teachings of Transience |
| Three | 17,500 | Three sealed scroll, two Information to Transience |
| 4 | 25,000 | 4 sealed scroll, 4 Information to Transience |
| 5 | 30,000 | Six sealed scroll, six Information to Transience |
| Six | 37,500 | 9 sealed scroll, 9 Information to Transience |
| Seven | 120,000 | 4 forbidden curse scroll, 4 Philosophies of Transience, one Dragon Lord’s Crown |
| Eight | 260,000 | Six forbidden curse scroll, six Philosophies of Transience, one Dragon Lord’s Crown |
| 9 | 450,000 | 9 forbidden curse scroll, 12 Philosophies of Transience, two Dragon Lord’s Crown |
| Ten | 700,000 | 12 forbidden curse scroll, 16 Philosophies of Transience, two Dragon Lord’s Crown, one Crown of Perception |
In case you want some assist making a crew, head on over to our Genshin Impression tier record to search out out who the very best DPS and help characters are. Then, try our Genshin Impression replace and Genshin Impression subsequent banner guides to see what’s arising.


